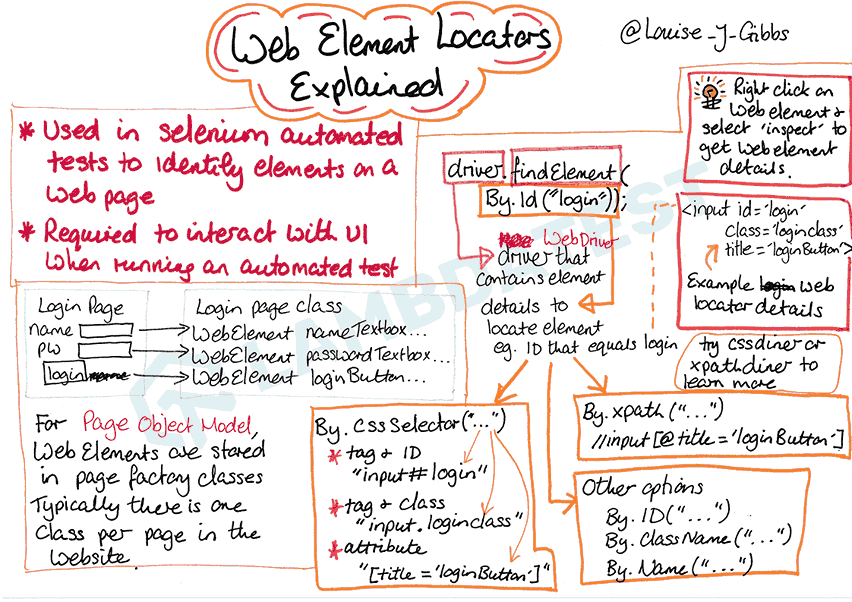
Developers often face challenges with WebElements exhibiting dynamic attributes, such as changing IDs and ClassNames in each session. This variability complicates using traditional attributes like ID or ClassNames for locating elements. In scenarios where similar elements are grouped with the same ID or ClassName, the dynamic nature makes locating elements using these attributes challenging. This is where the Text attribute becomes essential in automation testing.
For instance, consider a Button element with a dynamic ID and ClassName that changes from ‘ID-3465-text1’ to ‘ID-4434-textE2’ and ‘ID-Class-text45’ to ‘ID-Class-text73’ in each new session. Locating these elements using ID or ClassName attributes becomes challenging. This tutorial addresses this issue by exploring how to locate elements by text using Selenium WebDriver. It delves into various use cases where the Text attribute is invaluable, offering a comprehensive understanding of its applications.
In such cases, it becomes challenging to locate the WebElements using the ID or ClassName attribute, and this is when the Text attribute comes to the rescue while performing automation testing.
In this tutorial, we will explore locating elements by using findElement() by text in Selenium WebDriver. We’ll also delve into various use cases where the Text attribute proves invaluable, providing a comprehensive understanding of its applications.
By the end of this tutorial, you will gain practical insights into effectively finding elements based on their text content using Selenium WebDriver. Additionally, we will discuss specific test scenarios and use cases that will enhance your understanding and proficiency in using the Text attribute for element identification and interaction.
What is the findElement() method in Selenium?
The findElement() method in Selenium serves as a command to locate and identify a WebElement. This method offers multiple options for uniquely identifying a specific WebElement within a webpage by utilizing various web locators in Selenium, such as ID, Name, ClassName, and more.
Below is the syntax of the findElement() method in Selenium:
WebElement elementName= driver.findElement(By.<LocatorStrategy>("LocatorValue"));
As shown in the above syntax, this command accepts the By object as the argument and returns a WebElement object. The By is a locator or query object and accepts the locator strategy. The locator strategy can assume the below values:
ID
Name
ClassName
TagName
Link Text
Partial Link Text
XPath
CSS Selector
Why do we need the findElement() Method?
When performing web automation using Selenium WebDriver, the findElement() method is essential for interacting with WebElements on a web page. It allows you to locate and interact with specific elements on a web page programmatically. This enables the automation script to dynamically locate elements, making tests more resilient to changes in the web page’s structure.
In addition, the findElement() method can also be used to perform actions such as sending text, clicking, or retrieving values on the webpage. It can also perform different validations, such as checking for the presence, visibility, or specific attributes of a WebElement by locating it.
Another benefit of using the findElement() method is its broad support for various element locating strategies, such as ID, Name, ClassName, TagName, XPath, and CSS Selectors. This allows the user to select the most appropriate locator strategy based on the web page’s structure.
Difference between findElement() and findElements() Methods
The findElement() method in Selenium is frequently confused with the findElements() method. Although these two methods are similar in name and are used to find WebElements on a webpage, they differ in how they are used and the response they provide.
Aspects | findElement() | findElements() |
|---|---|---|
Usage | To find the only or first matching WebElement in case of multiple elements from the web page for the given locator. | To find all the matching WebElements from the webpage for the given locator. |
Return type | Returns only a single matching WebElement. | Returns the collection of all matching WebElements as a list. |
Indexing | No indexing, as only one WebElement is returned. | All WebElements are indexed as a list starting from 0. |
For no matching element, | Throws NoSuchElementException. | No exception is thrown. Instead, it returns an empty list of size 0. |
Syntax | WebElement element = driver.findElement(By locator); | List elements = driver.findElements(By locator); |
To get more detailed insights on the difference between findElement() and findElements(), follow this guide on the findElement() and findElements() methods in Selenium and enhance your understanding.
What is findElement() by Text in Selenium?
The findElement() by text in Selenium is used to locate a WebElement using its Text attribute. The text value is used mostly when the basic element identification properties, such as ID or ClassName, are dynamic, making it hard to locate the WebElement. The Text attribute helps you to verify the content present on the screen, it also helps check the visibility of the elements and more.
To use the Text attribute, you must use XPath as your locator strategy and the Text attribute of the element in the locator value.
Below is the syntax of XPath in Selenium.
XPath = //tagname[@Attribute=’Value’]
However, before we get started, it’s important to understand two built-in methods of Selenium, which will ultimately be used in findElement().
- text() – This built-in method in Selenium is used with XPath to locate an element based on its exact text value. The syntax of using text() with findElement() is:
WebElement ele = driver.findElement(By.xpath(“//<tagName>[text()=’textvalue’]”))
You can also extract text from a webpage and print it in the console using the getText() method in Selenium.
- contains() – Similar to the text() method, contains() is another built-in method which is used with XPath. However, this is used when writing the locator based on a partial text match. The syntax of using text() & contains() with findElement() is:
WebElement ele =driver.findElement(By.xpath(“//<tagName>[contains(text(),’textvalue’)]”))
To understand the use of XPath better follow this detailed guide on XPath in Selenium and get detailed knowledge about its usages and gain practical knowledge.
Using findElement() by Text for Complete Text match
The findElement() by text in Selenium is used to locate an element precisely matching a specific text. It utilizes XPath with the text() function to find elements where the text content exactly matches the specified text.
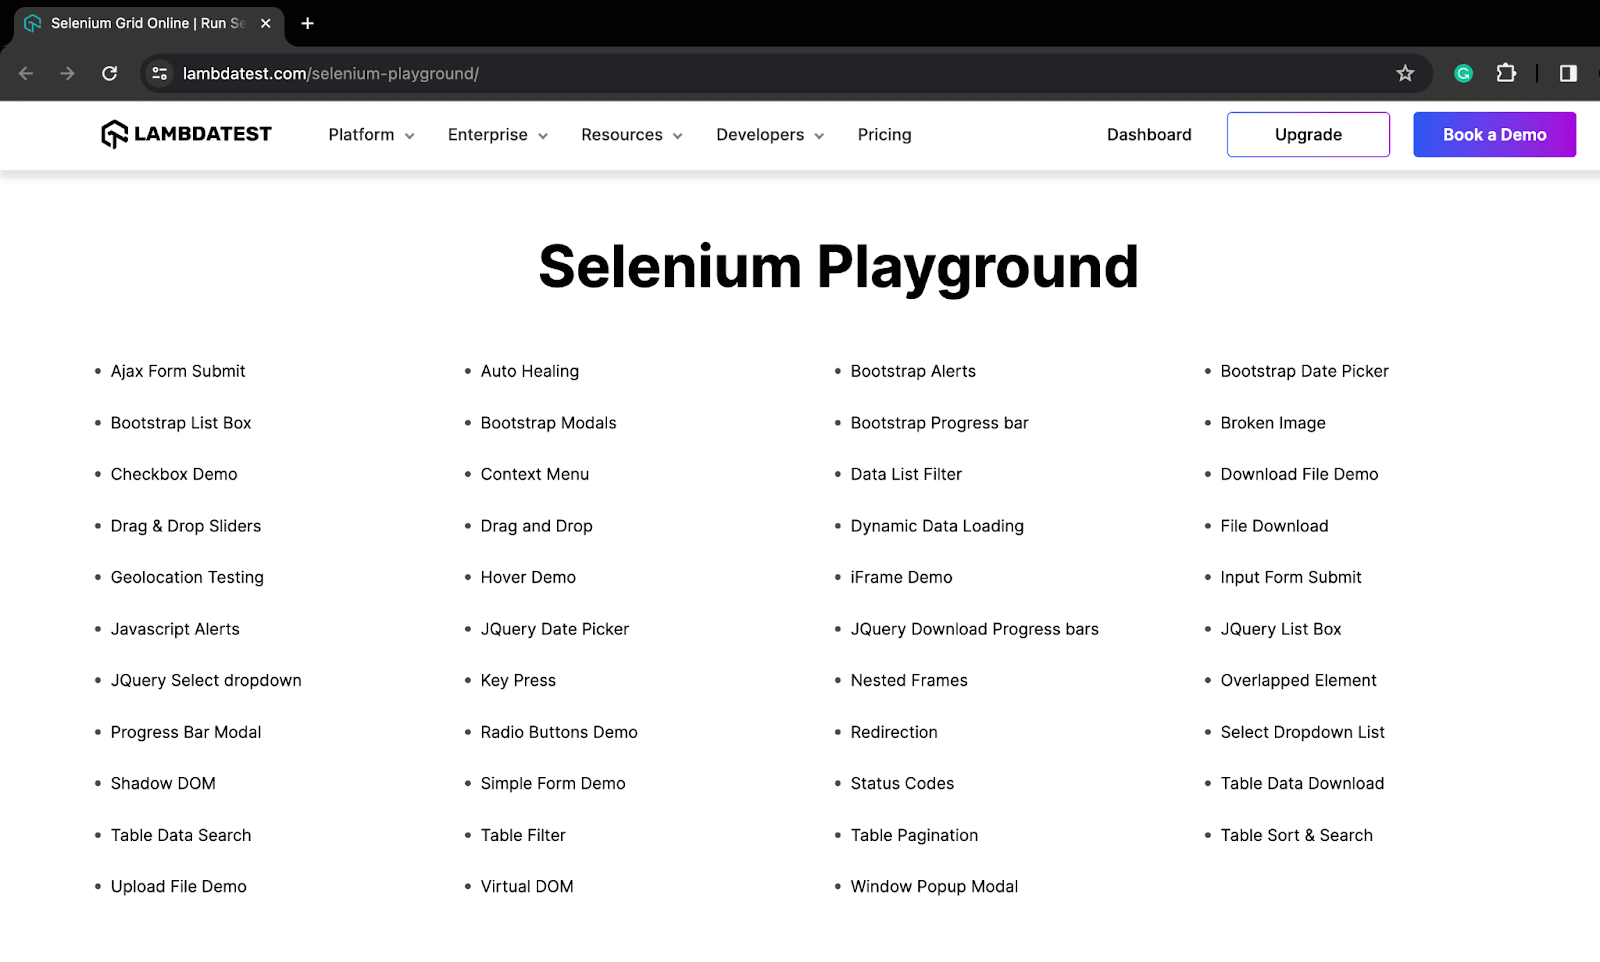
As previously explored, the syntax for a complete text match involves using text(). In this section on using findElement() by text in Selenium, let’s illustrate this with an example. We will utilize the Selenium Playground provided by LambdaTest to demonstrate the concept.
Test Scenario
Log in to Selenium Playground.Identify the WebElement for the Checkbox Demo link above using the text() method.Click on it and print the page header. |
We will use Selenium with Java to execute the above test scenario. In this case, we will run the test script over a cloud platform called LambdaTest.
LambdaTest is an AI-powered test orchestration and execution platform that lets you perform manual and automated testing at scale with over 3000+ real devices, browsers, and OS combinations. This platform enables parallel test execution by utilizing an online Selenium Grid. This feature significantly improves test execution efficiency and speed by concurrently running tests across multiple instances.
Below are the steps to perform the complete text match using Selenium.
Element Inspection
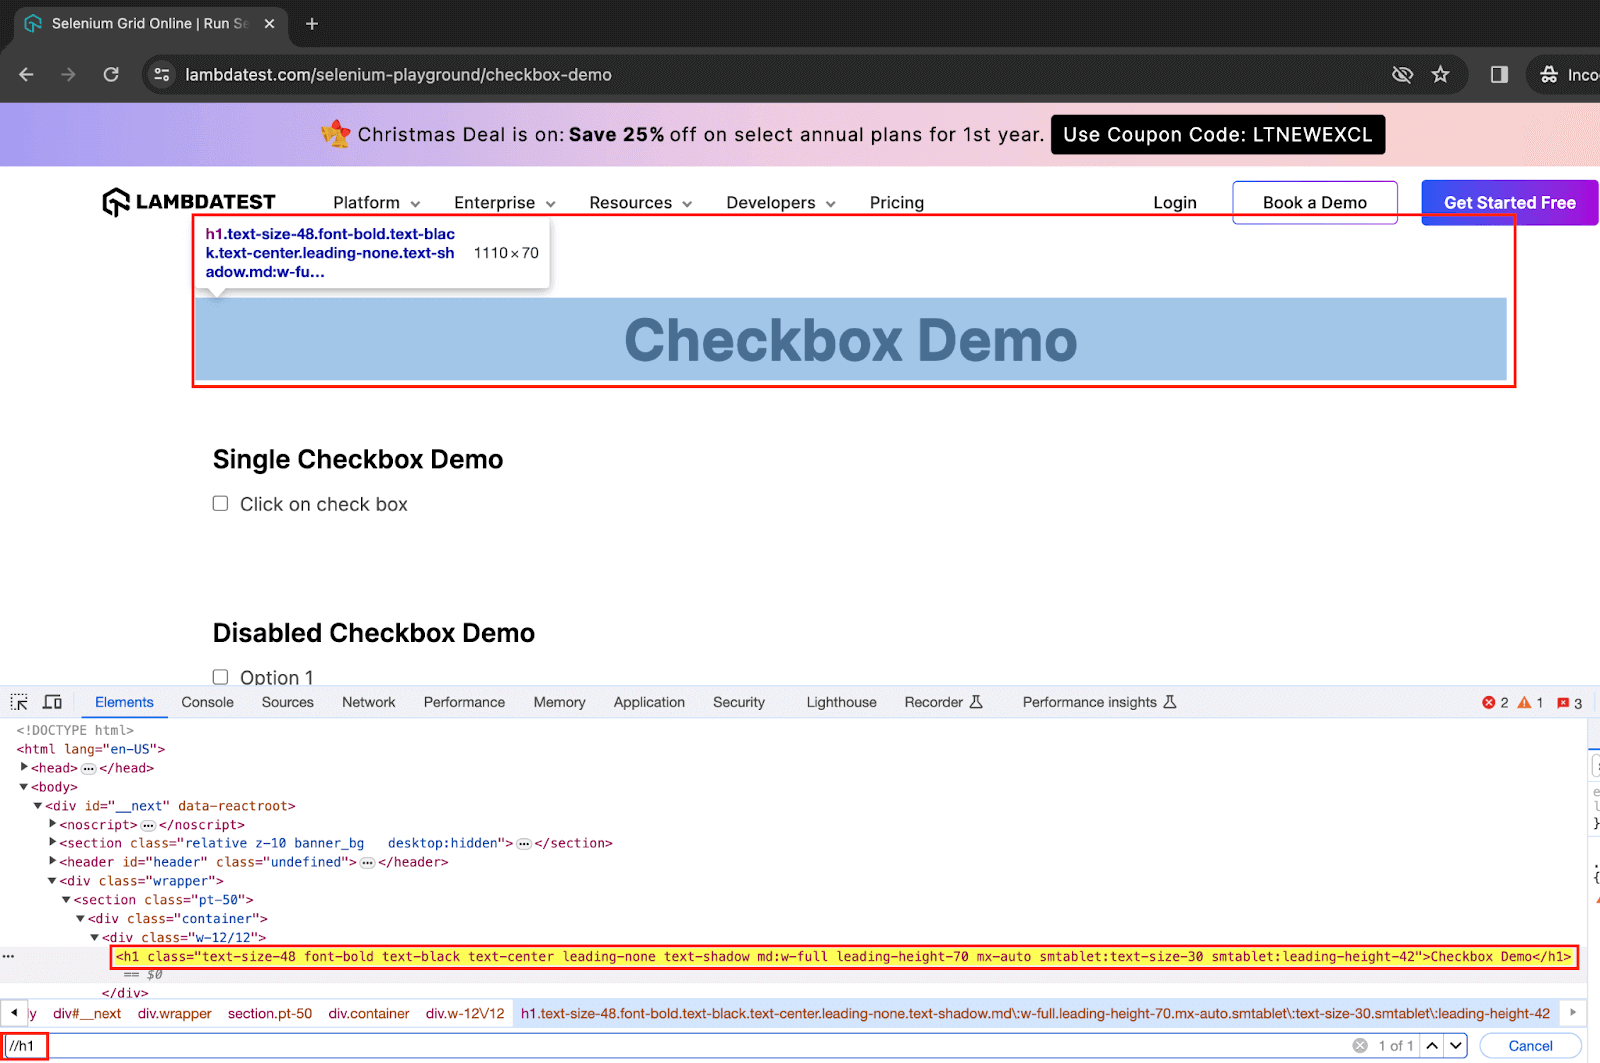
Step 1: To inspect the locator for the Checkbox Demo page. To do so inspect, you can right-click on the WebElement and click Inspect. On the Elements tab, you can start writing your locator.
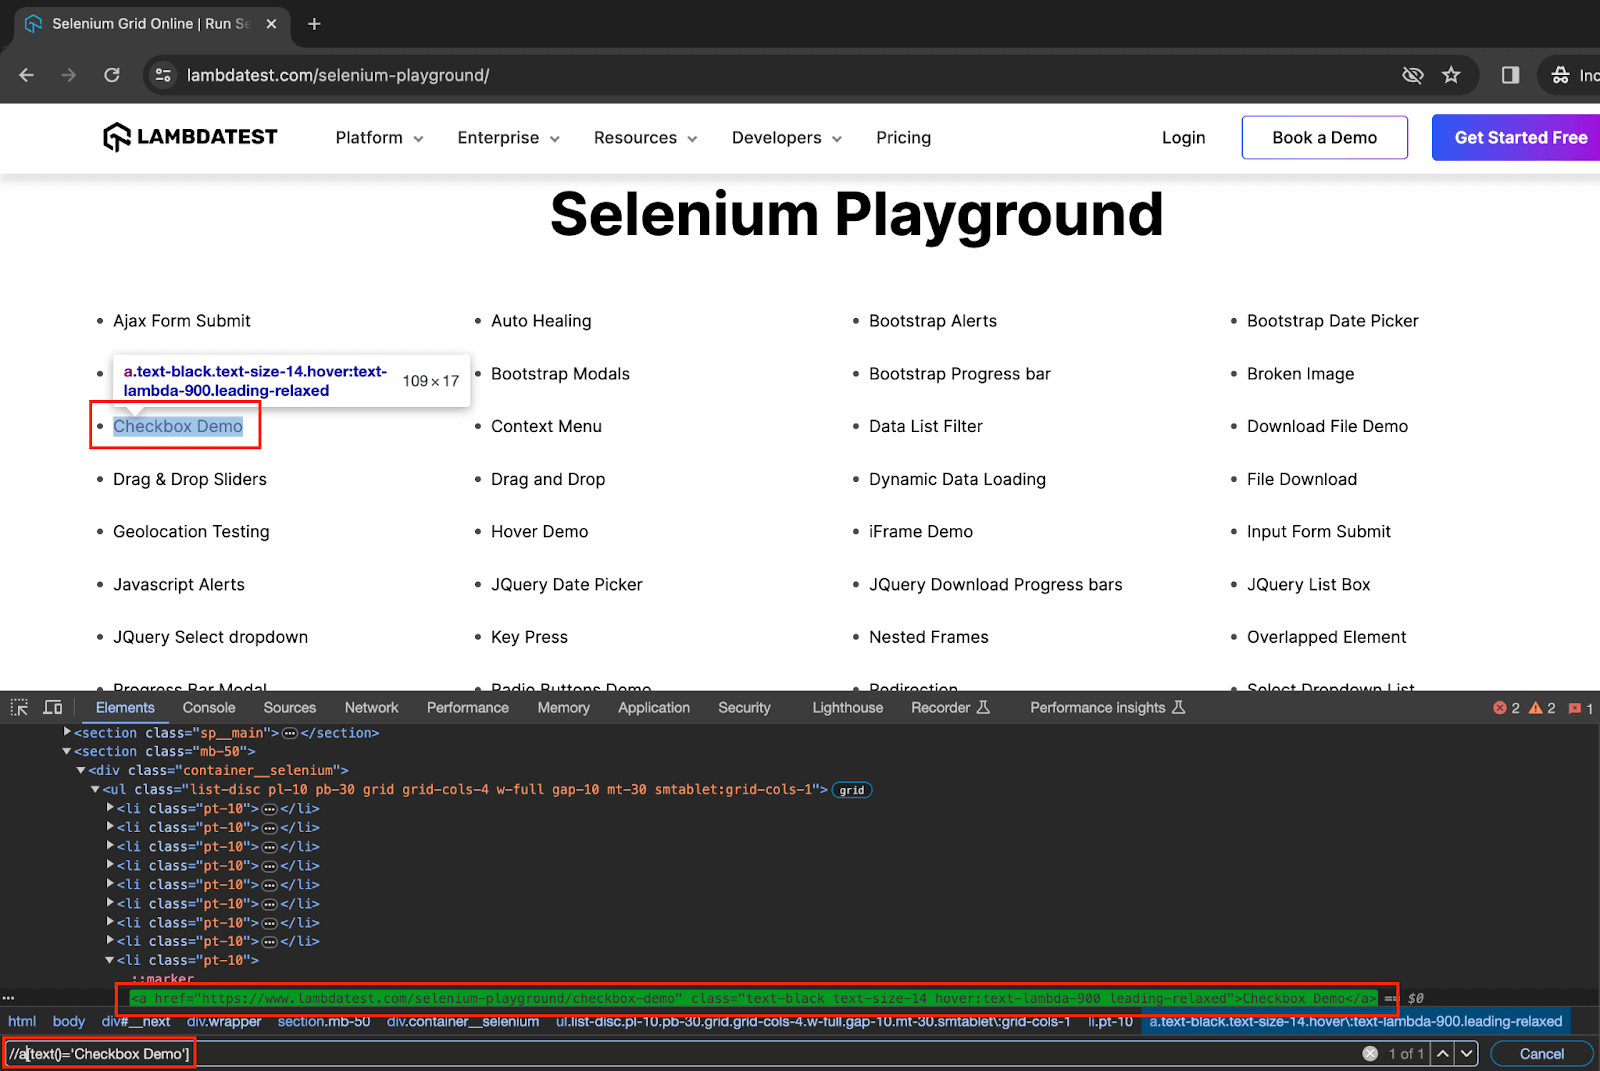
Step 2: As shown in the above image, we use the Checkbox Demo text with its tag a for a complete match, and hence, the correct implementation here would be:
WebElement checkbox= driver.findElement(By.xpath("//a[text()='Checkbox Demo']"));
After you have performed inspection and have identified the element now let us use the same and write the test case. But before we start writing the first test case, let us look at the base project setup used for all the demonstration test cases in this and the next sections.
Project Setup
Step 1. Launch Eclipse IDE and create a new Maven project. Name it as FindElementByText.
Step 2. Inside the src package, add a new package as a test. This package will have all the Java test files for this blog demonstration.
Step 3. Add a class file and name it BaseTest.java. This Java file contains all the common code for test execution, like setup and initializing the WebDriver, declaring and initializing public variables for the project, handling driver termination after test completion, etc.
This file will have the details and steps required to connect to the LambdaTest Selenium Cloud grid on which all the test cases will be executed.
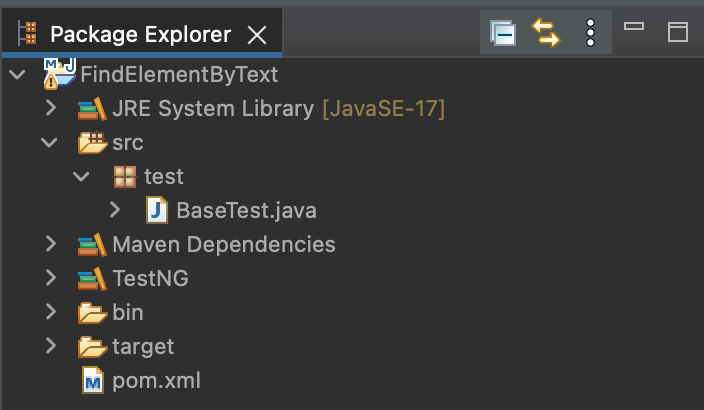
As this project uses Selenium and TestNG, add the latest stable versions of Selenium 4 and TestNG dependencies inside the pom.xml for best execution results. You can fetch the latest dependencies from the Maven repository.
Code Implementation
Below is the code implementation for the test scenario, demonstrating how to find a complete text match using findElement() by text in Selenium.
Step 1: Update the pom.xml file with the respective dependencies of Selenium and TestNG, as shown below.
<project xmlns="http://maven.apache.org/POM/4.0.0"
   xmlns:xsi="http://www.w3.org/2001/XMLSchema-instance"
   xsi:schemaLocation="http://maven.apache.org/POM/4.0.0 https://maven.apache.org/xsd/maven-4.0.0.xsd">
   <modelVersion>4.0.0</modelVersion>
   <groupId>FindElementByText</groupId>
   <artifactId>FindElementByText</artifactId>
   <version>0.0.1-SNAPSHOT</version>
   <build>
       <sourceDirectory>src</sourceDirectory>
       <plugins>
           <plugin>
               <artifactId>maven-compiler-plugin</artifactId>
               <version>3.8.1</version>
               <configuration>
                   <release>17</release>
               </configuration>
           </plugin>
       </plugins>
   </build>
   <dependencies>
       <dependency>
           <groupId>org.seleniumhq.selenium</groupId>
           <artifactId>selenium-java</artifactId>
           <version>4.16.1</version>
       </dependency>
       <dependency>
           <groupId>org.testng</groupId>
           <artifactId>testng</artifactId>
           <version>7.8.0</version>
           <scope>test</scope>
       </dependency>
   </dependencies>
</project>
Step2: Next, create a Java class file called BaseTest.java, and add code like below to have the driver setup and termination functions.
package test;


import java.net.*;
import java.util.HashMap;


import org.openqa.selenium.remote.RemoteWebDriver;
import org.testng.annotations.*;
import org.openqa.selenium.chrome.ChromeOptions;


public class BaseTest {

     public RemoteWebDriver driver = null;


     String username = System.getenv("LT_USERNAME") == null ? "<lambdatest_username>" : System.getenv("LT_USERNAME");
     String accessKey = System.getenv("LT_ACCESS_KEY") == null ? "<lambdatest_accesskey>" : System.getenv("LT_ACCESS");


     @BeforeTest
     public void setup()
     {
         try
         {
             ChromeOptions chromeOptions = new ChromeOptions();
             chromeOptions.setPlatformName("Windows 10");
             chromeOptions.setBrowserVersion("121.0");

             HashMap<String, Object> ltOptions = new HashMap<String, Object>();
ltOptions.put("build", "Find Element by Text");
              ltOptions.put("project", "Find Element by Text in Selenium");
             chromeOptions.setCapability("LT:Options", ltOptions);


             driver = new RemoteWebDriver(
                     new URL("https://" + username + ":" + accessKey + "@hub.lambdatest.com/wd/hub"), chromeOptions);
         }
         catch (MalformedURLException e)
         {
             e.printStackTrace();
         }
     }


     @AfterTest
     public void tearDown()
     {
         driver.quit();
     }
}
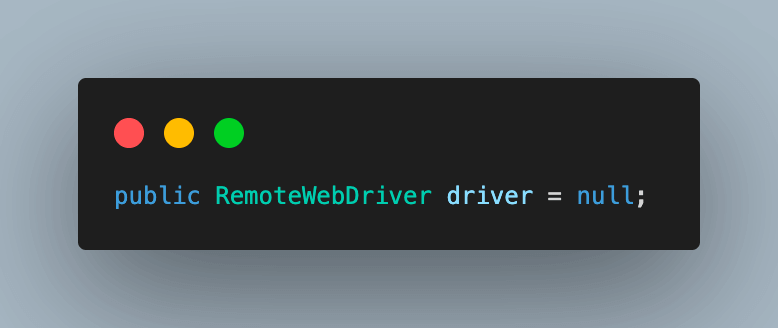
Step 3. Create an object of RemoteWebDriver and initialize it as null.
Step 4. Fetch your username and access key for the LambdaTest account from the Profile Avatar \> Account Settings \> Password & Security to connect to the cloud grid for test execution.

Alternatively, you can configure these as environment variables and directly fetch them in code.
For macOS and Linux:
export LT_USERNAME=LT_USERNAME
export LT_ACCESS_KEY=LT_ACCESS_KEY
For Windows:
set LT_USERNAME=LT_USERNAME
set LT_ACCESS_KEY=LT_ACCESS_KEY
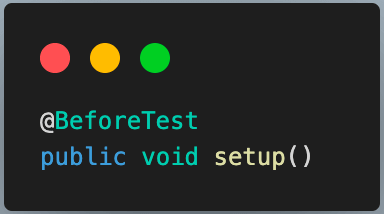
Step 5: Add a method to this class and name it setup(). Annotate it with the @BeforeTest annotation in TestNG so that it is executed before each test.
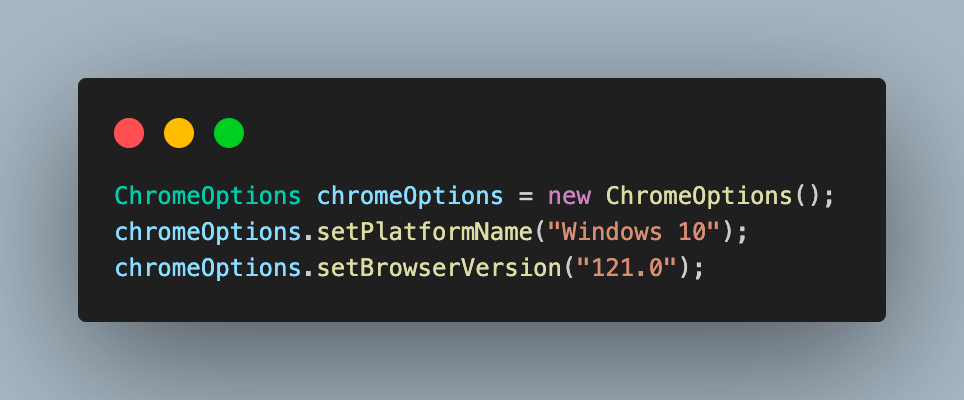
Step 6: Start by creating an object in the ChromeOptions class. This can be used to set the OS and browser versions.
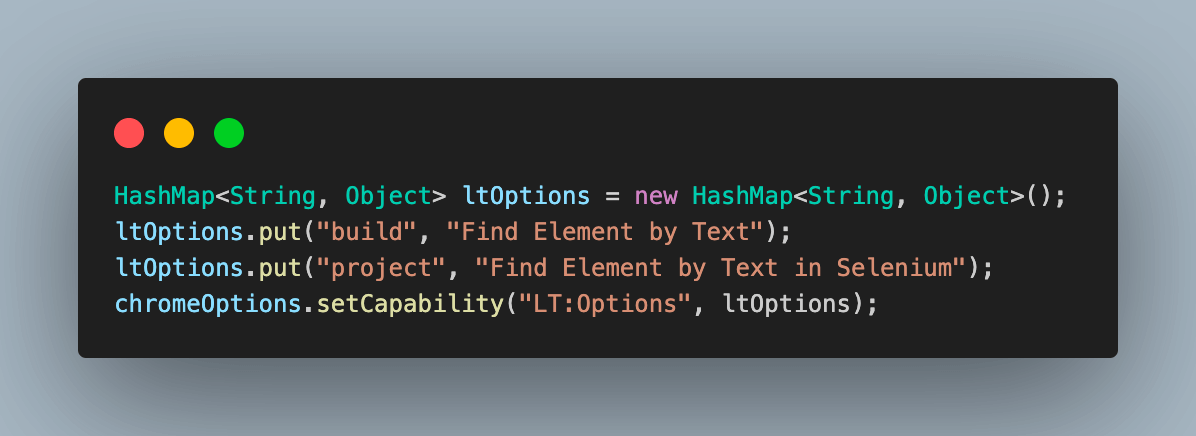
Step 7: Create a HashMap type variable to pass the additional browser capabilities required by the LambdaTest platform to support test execution on their cloud Grid. This will help identify the dashboard test results using the build name and other details.
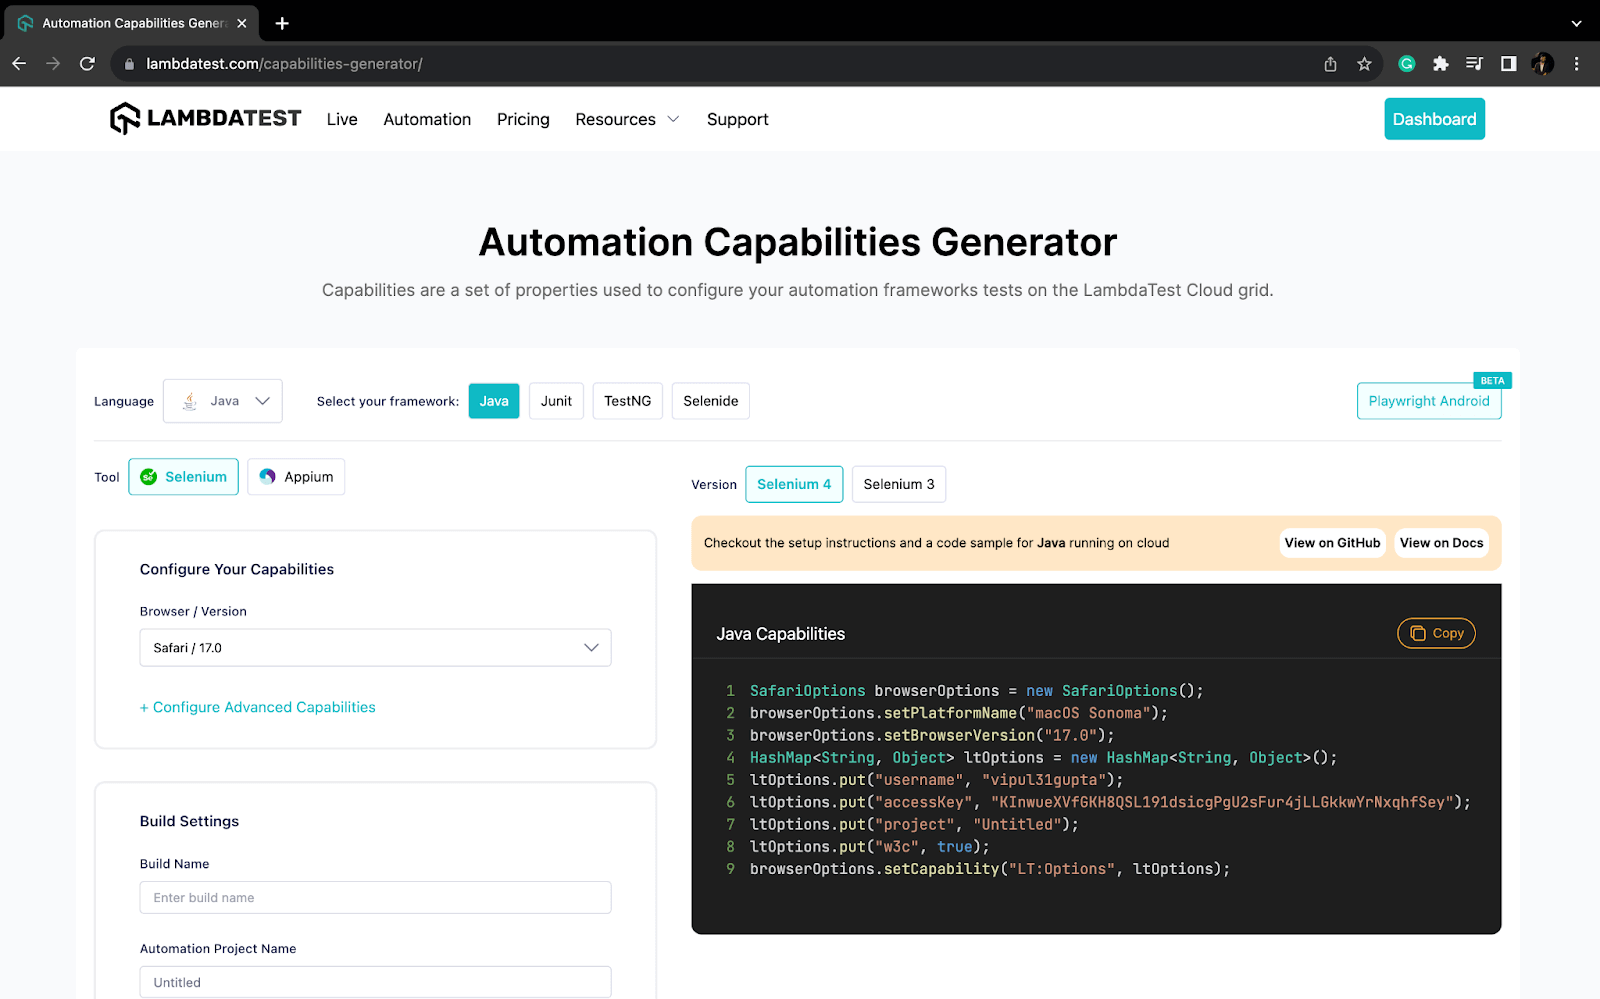
Step 8: We can fetch the required browser capabilities for the LambdaTest platform by navigating to the Automation Capabilities Generator. This helps by offering ready-to-use code for setting up browser capabilities that can be used in execution.
Step 9: Use the Selenium RemoteWebDriver to connect to the LambdaTest remote grid using your credentials and the chromeOptions object containing all specified browser capabilities.

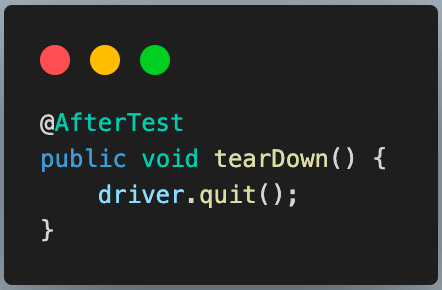
Step 10: Add a new method to close the browser and terminate the web driver session after each test execution. Name it as tearDown(), and annotate it with @AfterTest.
Having set up the BaseTest.Java file to hold the common code, the next move is to add a test file to write the test scenario for findElement() by text in Selenium for a complete text match.
Step 11: Create another Java class file called TestFindByTextForCompleteMatch.java and add the code set to perform browser actions as shown below.
Filename: TestFindByTextForCompleteMatch.java
package test;


import org.openqa.selenium.By;
import org.openqa.selenium.WebElement;
import org.testng.annotations.Test;


public class TestFindByTextForCompleteMatch extends BaseTest{


   @Test
   public void testFindElementByCompleteTextMatch()
   {
       System.out.println("Logging into Lambda Test Selenium Playground");
       driver.get("https://www.lambdatest.com/selenium-playground/");
       WebElement checkBoxDemoPage= driver.findElement(By.xpath("//a[text()='Checkbox Demo']"));
       checkBoxDemoPage.click();
       System.out.println("Clicked on the Checkbox Demo Page");
       WebElement header=driver.findElement(By.xpath("//h1"));
       System.out.println("The header of the page is:"+header.getText());
   }
}
Before we look into the result, let us understand the code in a step-by-step procedure.
Code Walkthrough
In this section on how to find element by text in Selenium, let’s look at the different areas of code in detail.
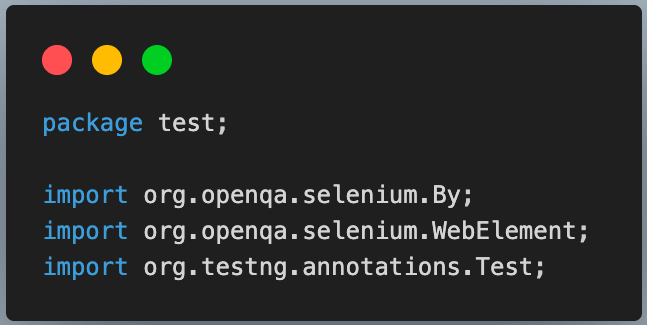
It imports all the necessary classes of RemoteWebDriver, TestNG, and other dependencies to set the respective browser capabilities and run the test cases on the grid.

It extends the newly created testclass with BaseTest. This will help to inherit all its functions and driver variables.

It first navigates to the LambdaTest Selenium Playground.
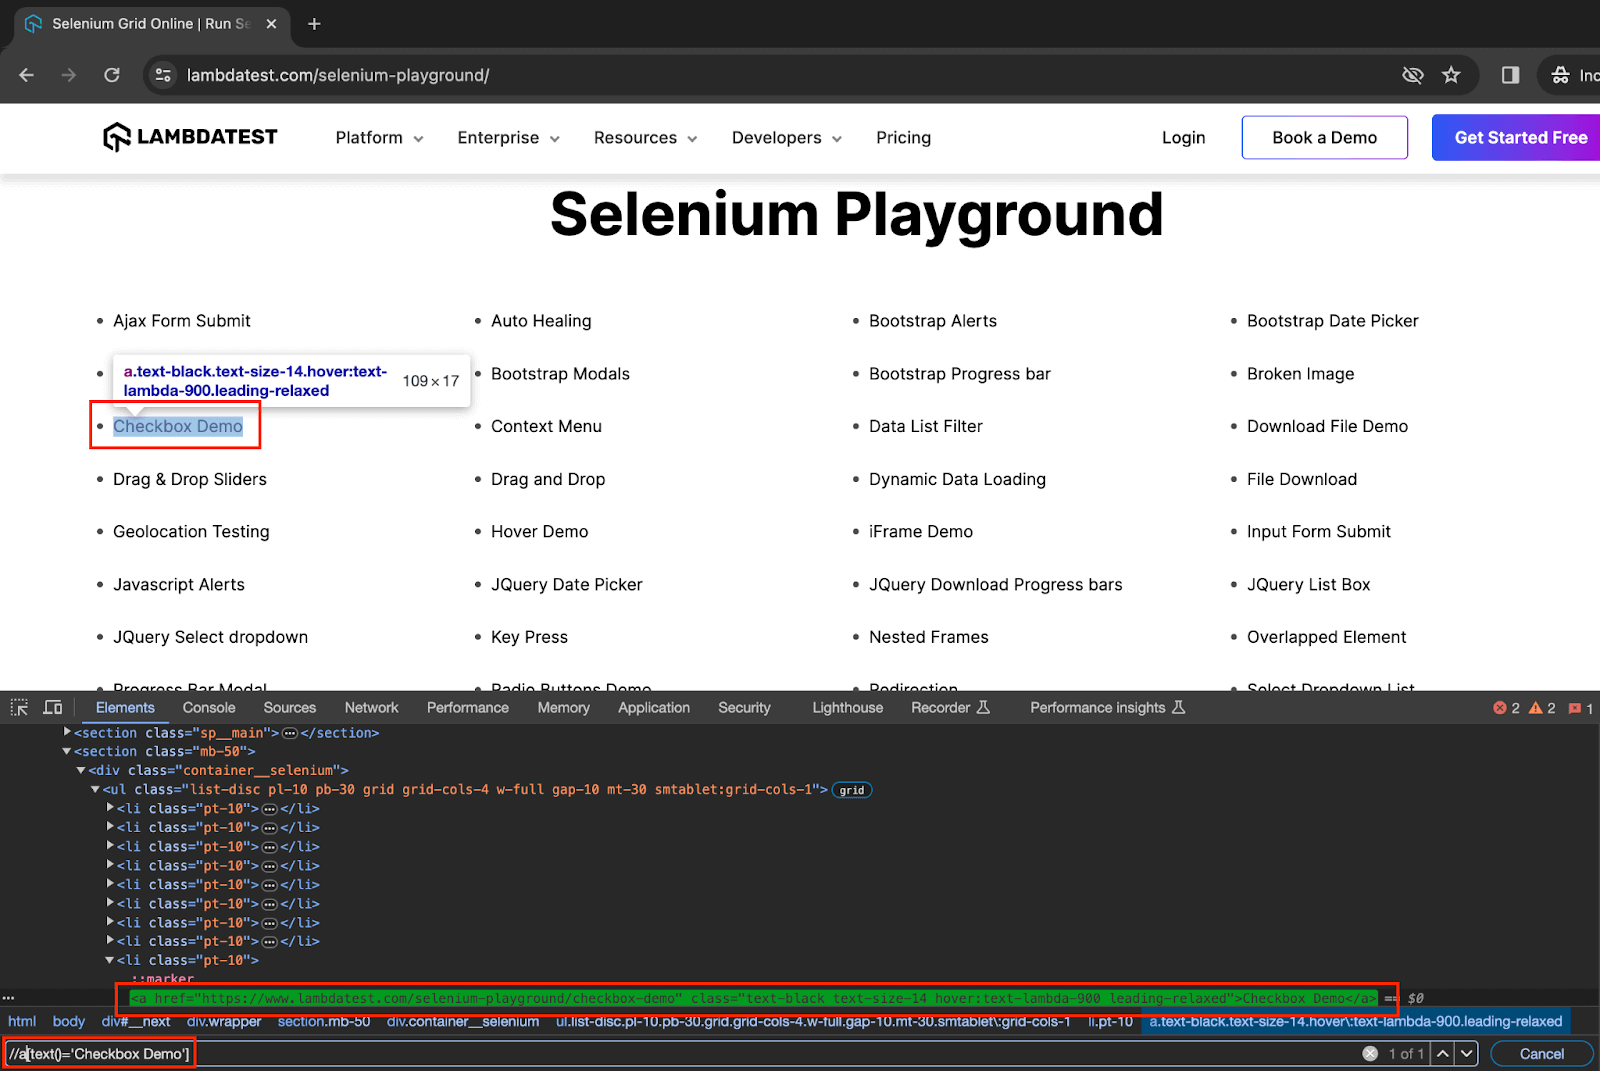
After that, we locate the Checkbox Demo button using a complete text match and click on the same.

In the end, we are printing the header of the web page.

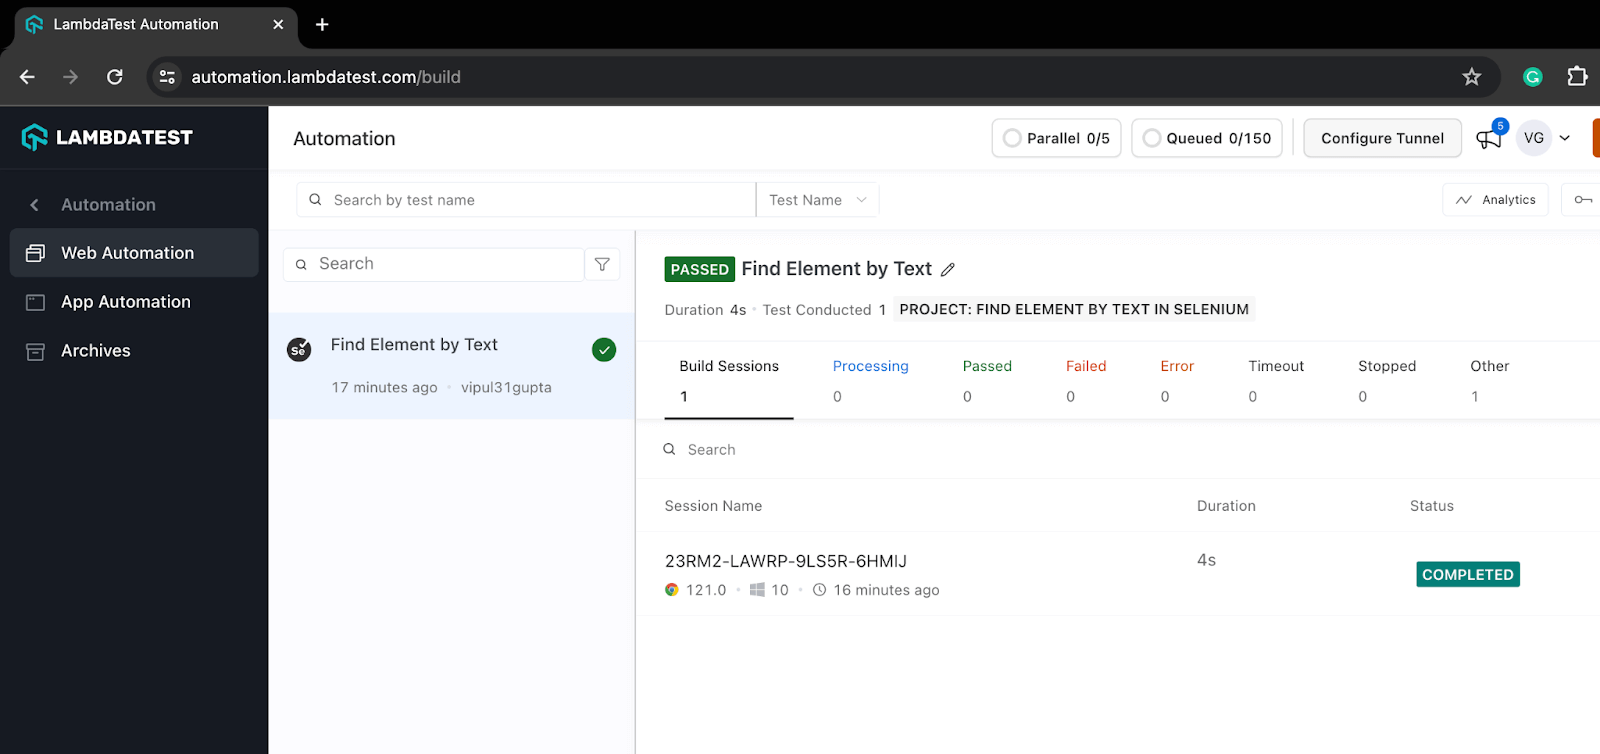
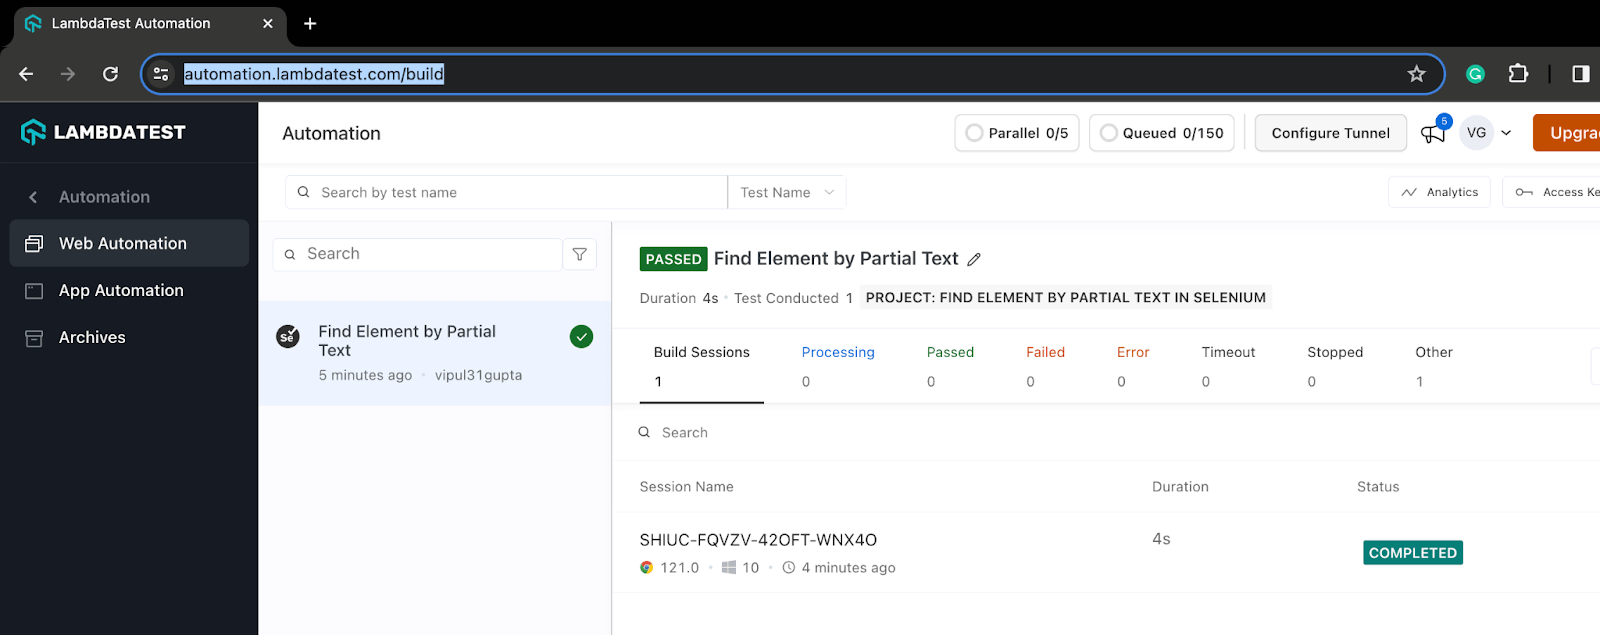
Once the tests are completed and executed, you can view your test results, logs, and the recording in your LambdaTest Automation Dashboard.
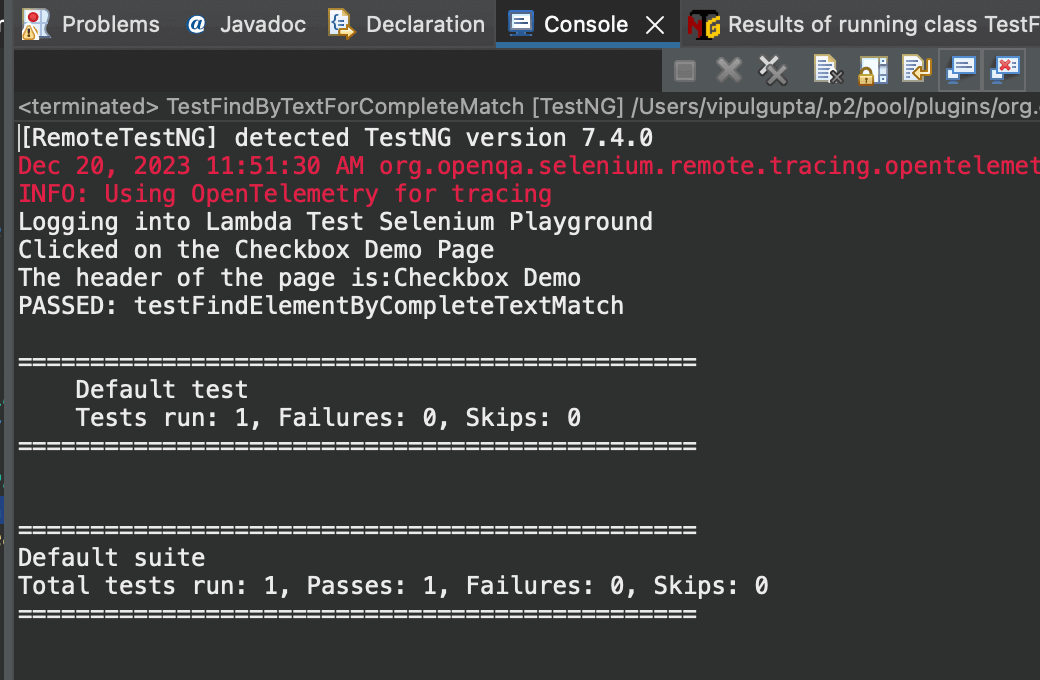
Result
Using findElement() by Text for Partial Text match
To locate an element with a partial text match in Selenium, you can use XPath with the contains() function to find elements containing the specified partial text.
In the earlier example, we discussed using findElement() by text in Selenium for a complete text match. Now, let’s explore how to utilize findElement() for partial text matching to locate WebElements.
Test Scenario
Log in to Selenium Playground.Identify all the WebElements that have a Table in their names.Print the text of all such WebElements. |
Below are the steps to perform the partial text match using Selenium.
Element Inspection
To inspect the locator for the Table element. To do so you can right-click on the WebElement and click Inspect. On the Elements tab, you can start writing your locator.
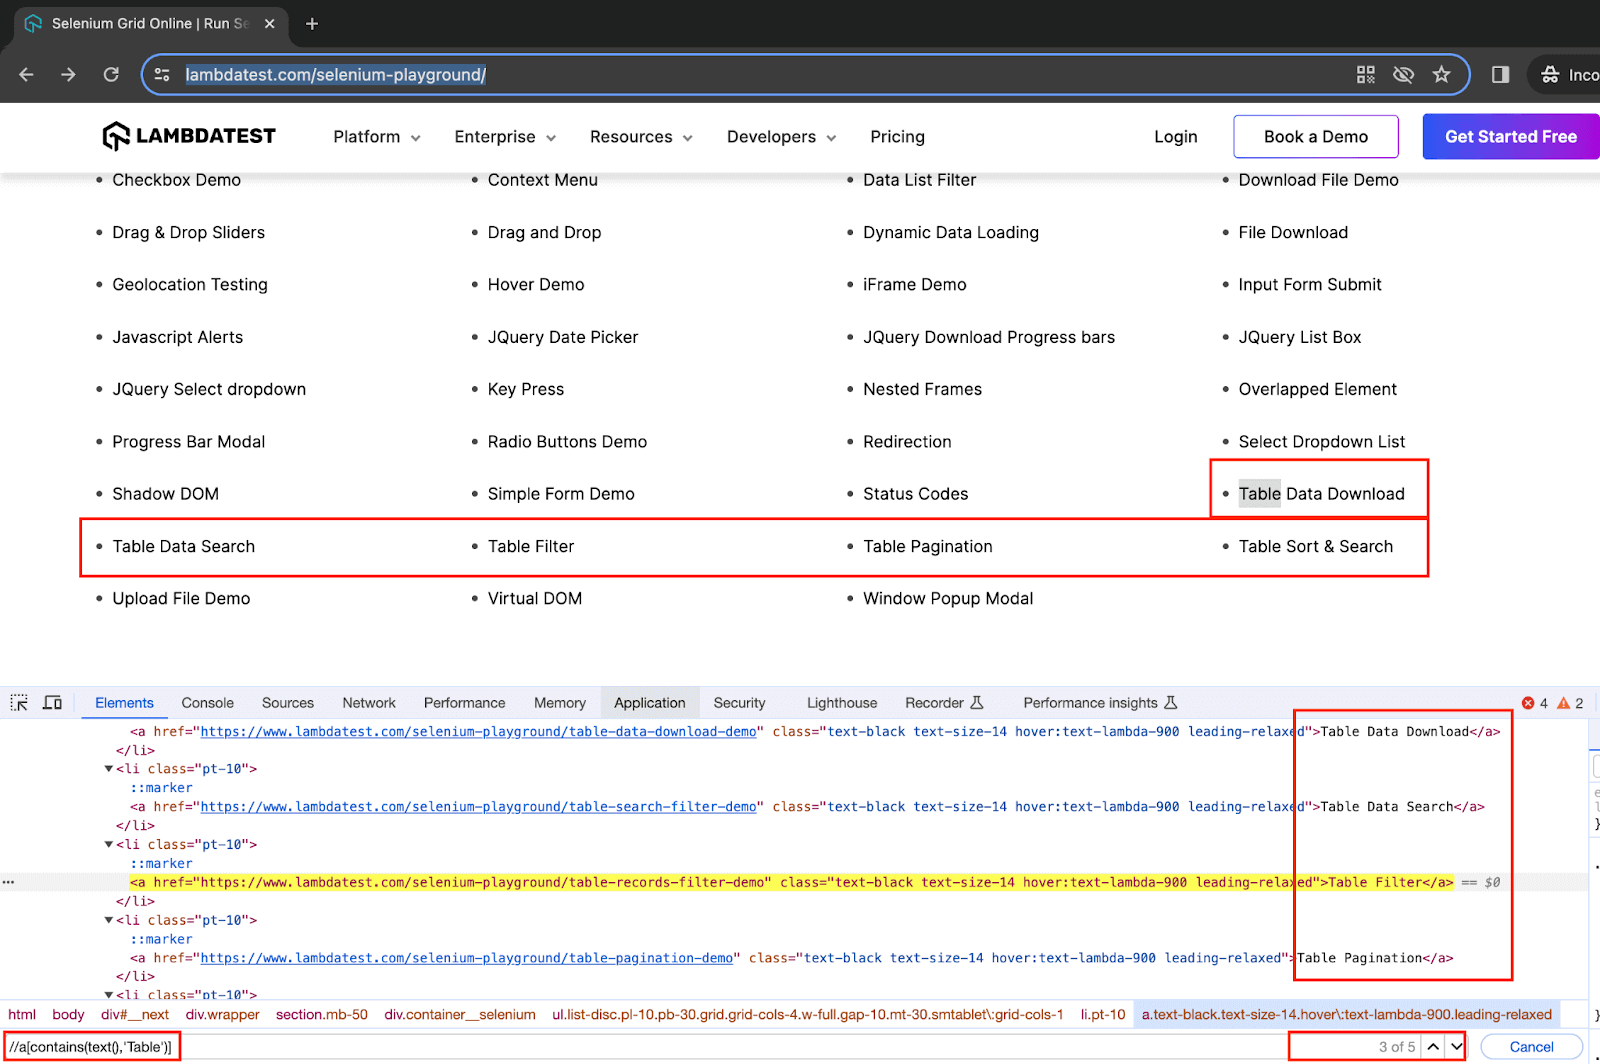
As shown in the above picture, we use the Table text with its tag a for a partial match, and as a result, we get a total of 5 WebElements using the above locator. Since there is more than 1 WebElement, we will use findElements() by text in Selenium.
findElements() by text in Selenium returns the list of WebElements that match the locator value, unlike findElement(), which returns only a single WebElement. If there are no matching elements within the web page, findElements() returns an empty list.
The syntax of findElements() in Selenium is:
List<WebElement> listName= driver.findElements(By.<LocatorStrategy>(“LocatorValue”));
Hence, the correct implementation using findElements() by text in Selenium with partial text match here would be:
List<WebElement> tableOptions=driver.findElements(By.xpath(“//a[contains(text(),’Table’)”)
As we have all the details that would help us perform a partial text match using the findElements() in Selenium now let us write the test script for the above test scenario.
Code Implementation
As previously highlighted in the demonstration for the findElement() by text in Selenium with a complete text match, we will maintain the same project structure and BaseTest.java. Simply add a new test class file to implement partial text matching.
Step 1: Create a new test class file called TestFindByTextForPartialMatch.java and add the code set to perform browser actions as shown below.
package test;


import java.util.List;


import org.openqa.selenium.By;
import org.openqa.selenium.WebElement;
import org.testng.annotations.Test;


public class TestFindByTextForPartialMatch extends BaseTest {


   @Test
   public void testFindElementByPartialTextMatch() {


       System.out.println("Logging into Lambda Test Selenium Playground");
       driver.get("https://www.lambdatest.com/selenium-playground/");
       List<WebElement> tableOptions = driver.findElements(By.xpath("//a[contains(text(),'Table')]"));
       for (WebElement e : tableOptions) {
           System.out.println("The different options with table in name are:" + e.getText());
       }
   }
}
Before we move to the result, let us understand the code in a step-by-step procedure.
We have seen findElement() by text in Selenium for complete and partial text matches. There are also ways to findElement() by link and partial link. To learn more about using findElements() by link and partial link, follow this guide on using findElements() by Link Text and Partial Link Text in Selenium and get detailed information with practical insights.
Code Walkthrough

It extends the newly created testclass with BaseTest. This will help to inherit all its functions and driver variables.

It starts by navigating to the Selenium Playground web page.

It locates all the WebElements with Table in their text and stores them in a list.

Later, we iterate over the list and print their text.
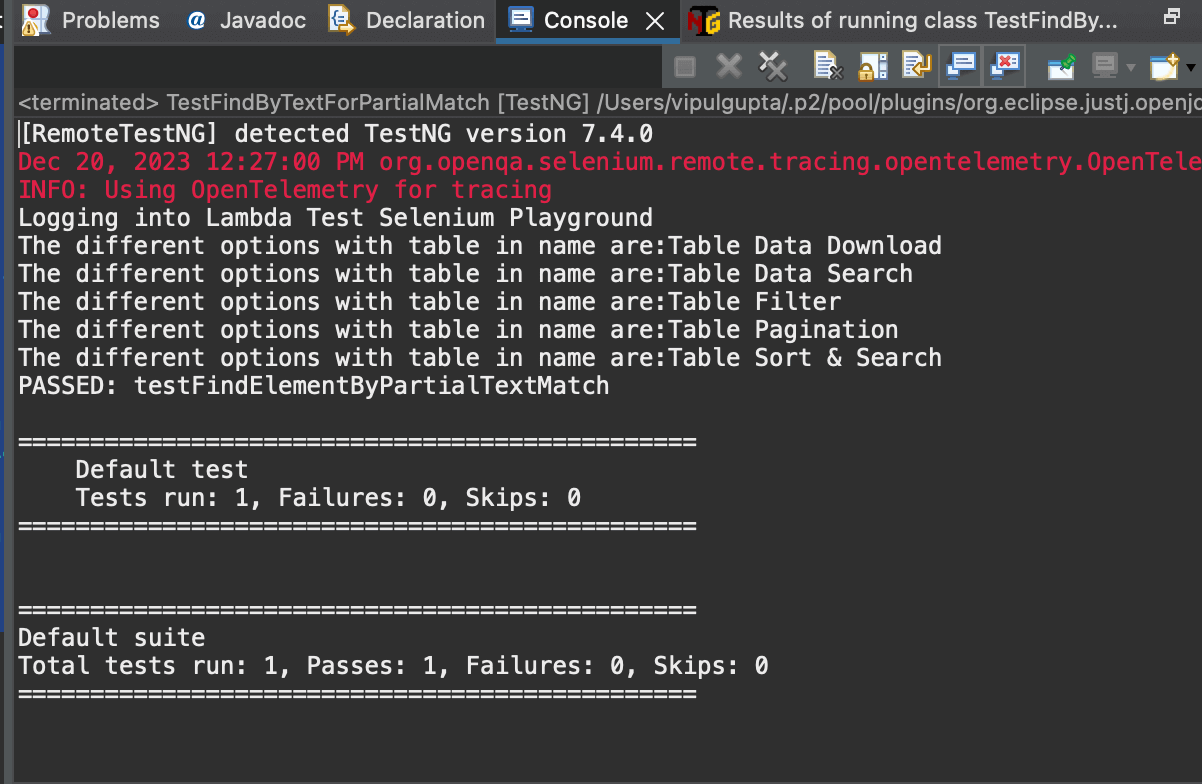
Once the tests are completed, you can also view your test reports, test logs, and the test recording as well in your LambdaTest Automation Dashboard.
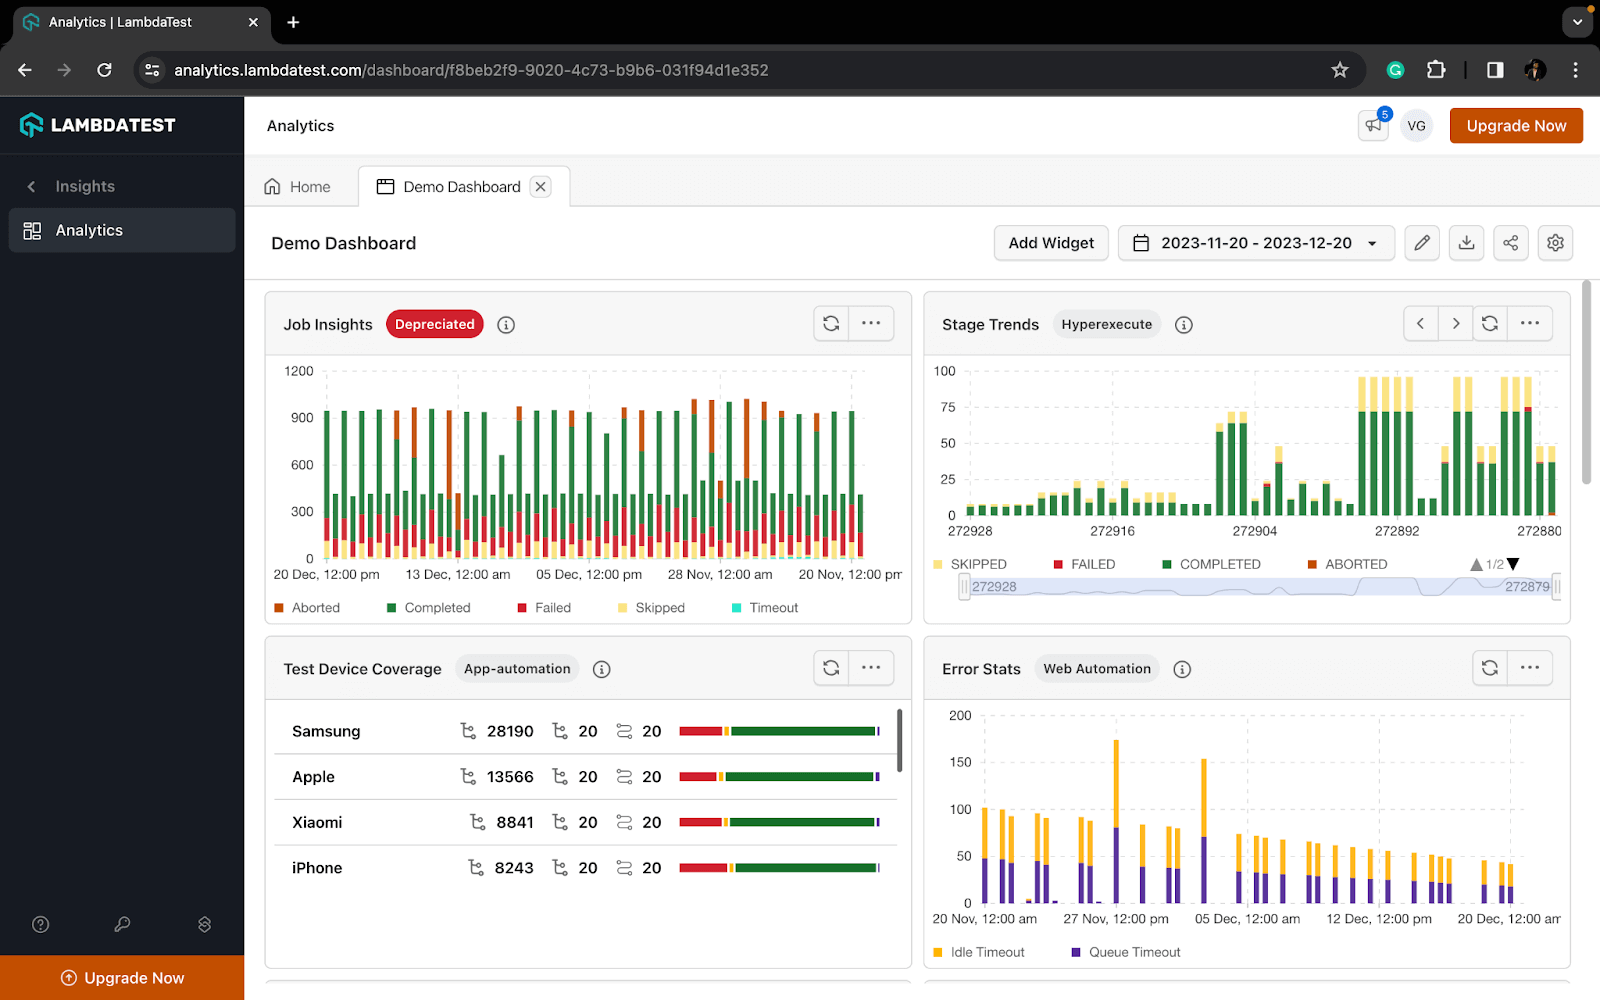
You can navigate to the LambdaTest Analytics Dashboard to access detailed metrics and results of your tests. You can view comprehensive details, metrics, and insights related to your test executions. The Test Overview section provides a quick assessment of test performance and overall health, while the Test Summary presents the number of passed and failed tests, offering insights into the overall efficiency of your test suite.
Result
Using findElement() by Text with text() and contains() Methods
In the previous section, we learned how partial text matches work with the findElements() by text in Selenium. In this section, we understand the working of the findElement() by text in Selenium for finding a WebElement that contains a specific text using text() and contains() methods.
To use both methods simultaneously, we will use a test scenario below.
Test Scenario
Log in to Selenium Playground.Identify the WebElement that has Dynamic in its name and click on it.Print the header of the loaded page after the action. |
Below are the steps to use findElement() by using text() and contains() using Selenium.
Element Inspection
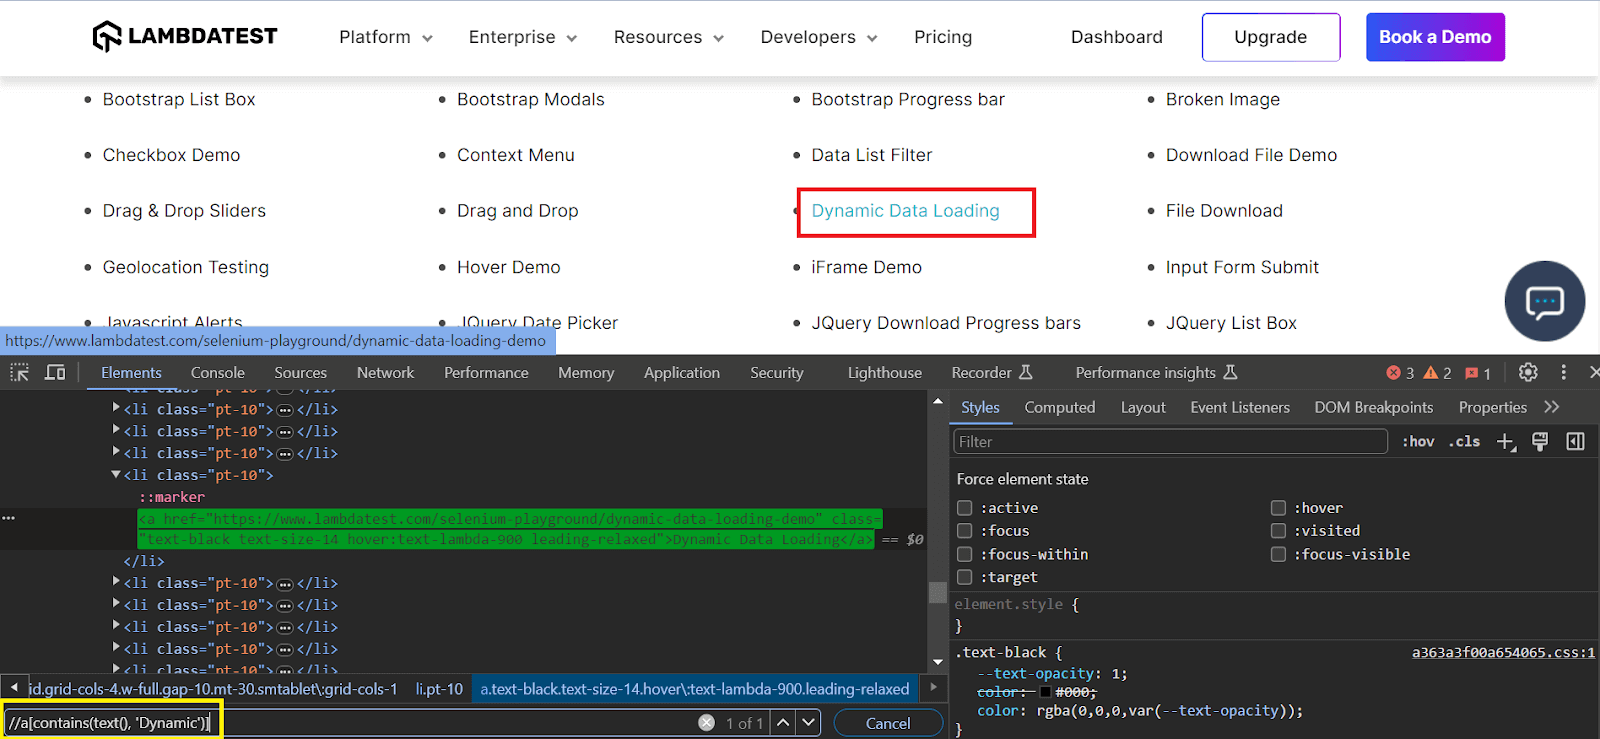
To inspect the Dynamic Data Loading title locator, you can right-click on the WebElement and click Inspect. On the Elements tab, you can start writing your locator.
Code Implementation
As shown in the above picture, we use Dynamic as the specific text for which the matching element will be clicked. For this, we use a combination of text() and contains() methods of the findElement() by text in Selenium.
The syntax of findElements() in Selenium is:
WebElement element= driver.findElement(By.<LocatorStrategy>(“LocatorValue”))
Hence, the correct implementation using findElement() by text in Selenium with text() and contains() method would be:
WebElement element= driver.findElement(By.xpath(“//a[contains(text(),’Dynamic’)”)
Step 1: Create a new test class file called TestFindByTextForSpecificContainingText.java and add the test code to perform a set of actions as shown below.
package test;


import org.openqa.selenium.By;
import org.openqa.selenium.WebElement;
import org.testng.annotations.Test;


public class TestFindByTextForSpecificContainingText extends BaseTest {
   @Test
   public void testFindElementBySpecificTextMatch() {
       System.out.println("Logging into Lambda Test Selenium Playground");
       driver.get("https://www.lambdatest.com/selenium-playground/");
       WebElement element = driver.findElement(By.xpath("//a[contains(text(),'Dynamic')]"));
       element.click();
       System.out.println("Clicked on the Dynamic Data Loading link");
       WebElement header = driver.findElement(By.xpath("//h1"));
       System.out.println("The header of the page is:" + header.getText());
   }


}
Before jumping to the result, let’s understand the code in a step-by-step procedure.
Code Walkthrough

Extend the newly created testclass with BaseTest. This will help to inherit all its functions and driver variables.

Navigate to the Selenium Playground web page.

Locate the WebElement with Dynamic in its text and click on it.

Fetch the page title for the newly loaded page and print the same.
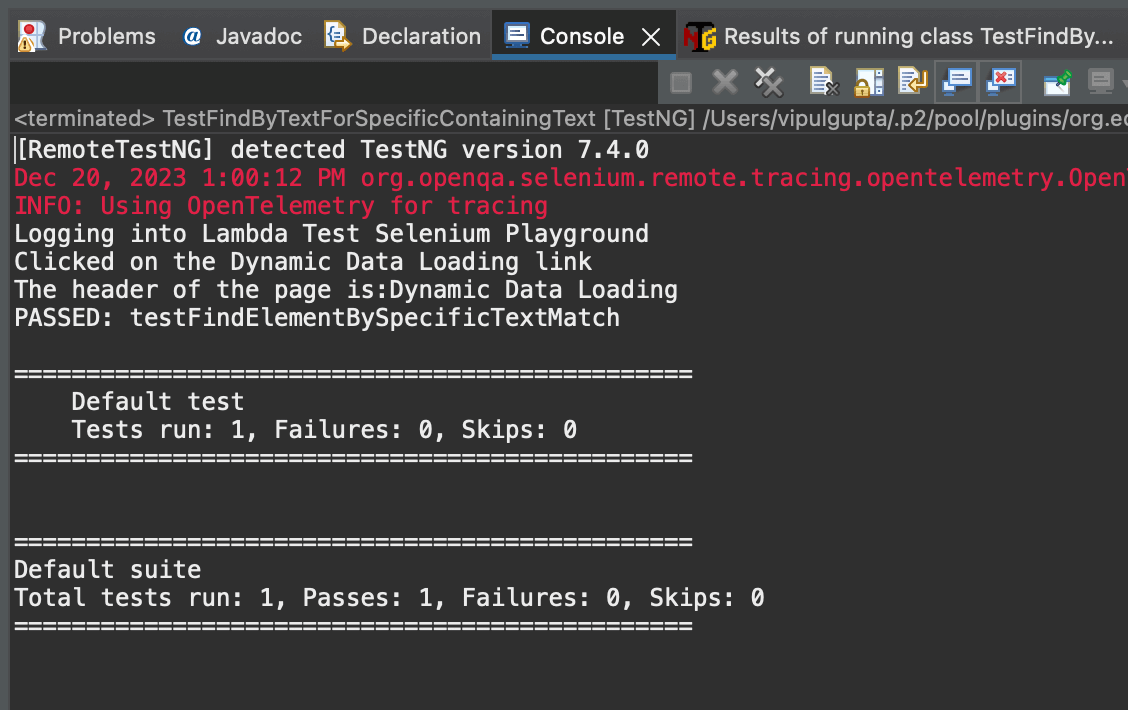
Once the tests are completed, you can also view your test results, logs, and the test recording as well in your LambdaTest Automation Dashboard.
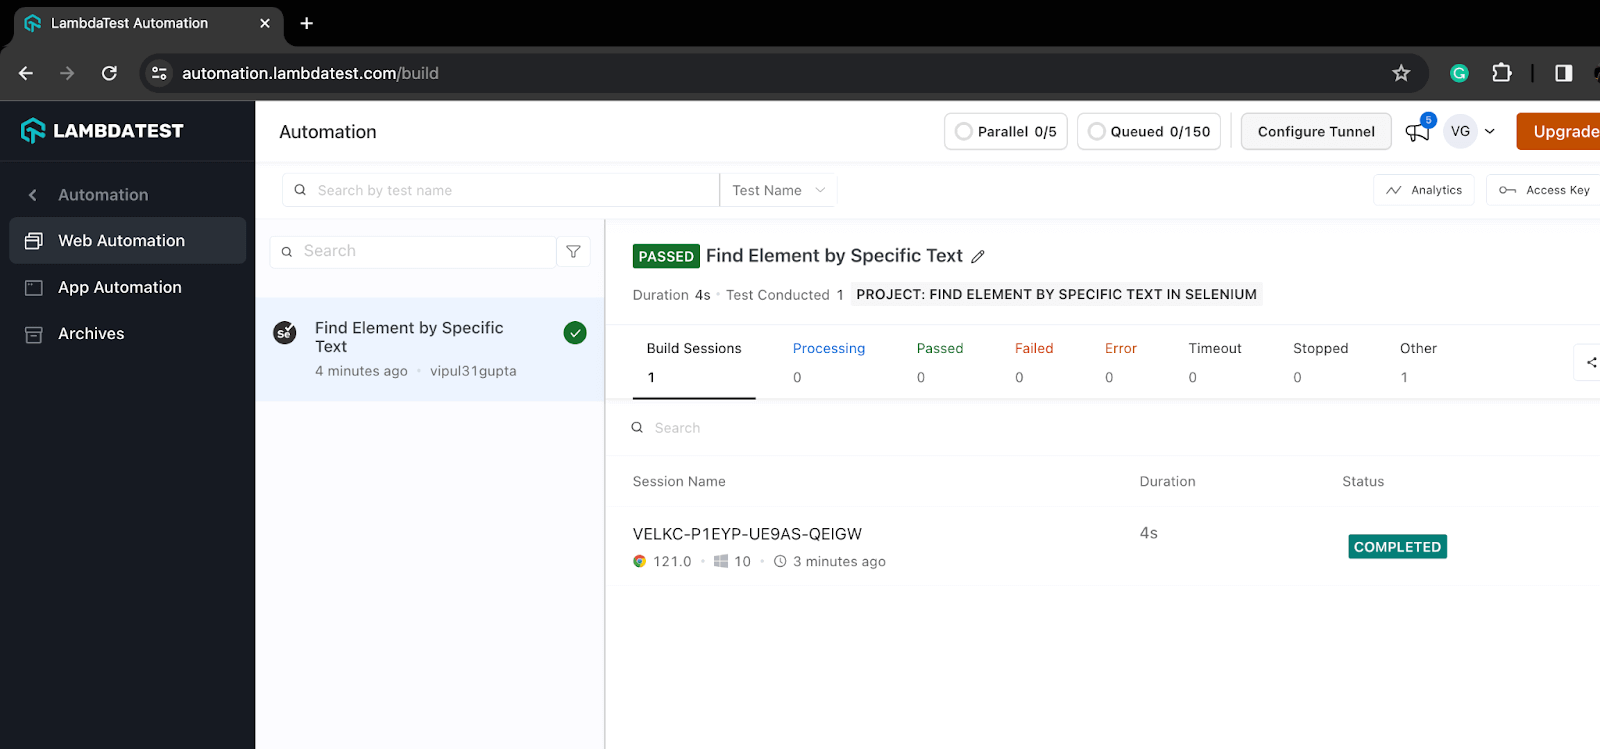
Result
Conclusion
In this Selenium Java tutorial on how to findElement() by text in Selenium WebDriver, we explored finding an element using text in Selenium. We saw how to use the text() method in complete and partial text matches. We also saw how we could use it in the case of findElements() and get a list of WebElements through text match. In the end, we also implemented the cases using Selenium with Java on a cloud Selenium Grid.
Honestly, using text() is one of my favorite Selenium methods when locating WebElements, as it’s very easy to implement and can be tweaked to match this use case.
I hope you enjoyed reading this article on how to findElements() by text in Selenium, and learned more about findElement() by text, and I believe this method will become your favorite too. We recommend you check out this exhaustive Selenium locator cheat sheet to stay on top of your testing game while handling locators.
Happy Testing!!
